Step 1: Locate the Source Report for your Calendar
- Log in to your tenant as an administrator.
- Open the app that contains your calendar.
- Navigate to the location of the calendar you wish to transition.
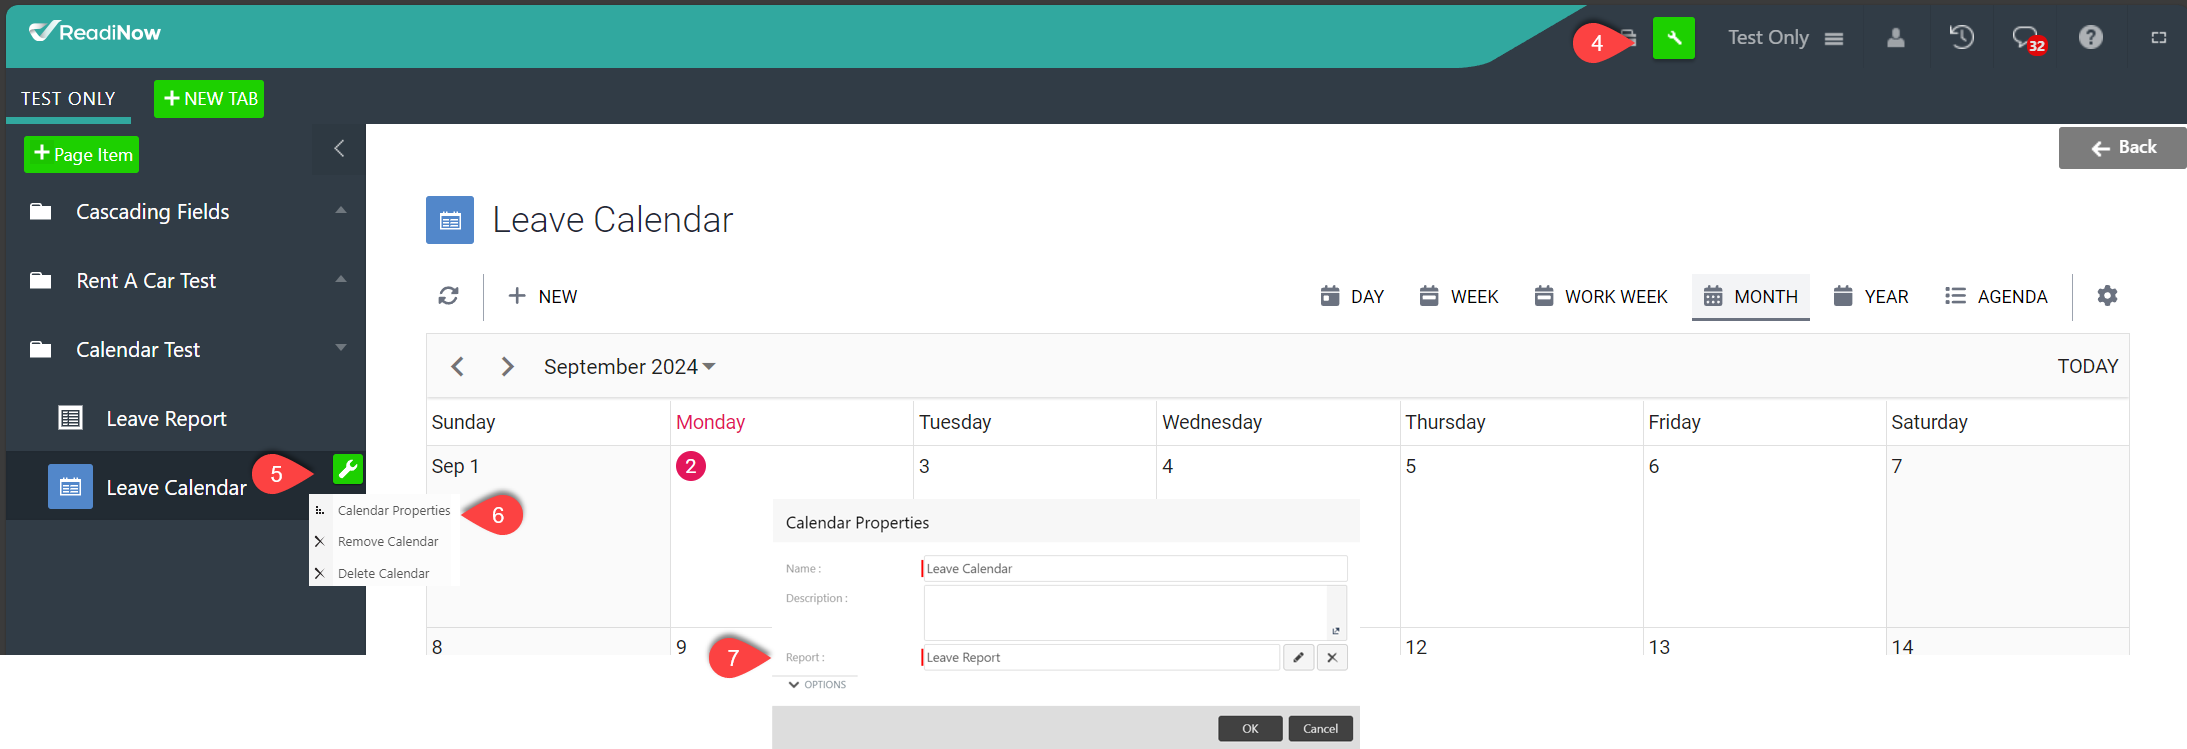
- Enter configuration mode by clicking the configure (spanner)
 icon in the top right-hand navigation bar.
 - Hover over your calendar in the left-hand navigation to reveal the configure icon.
- Click the configure icon and select Calendar Properties from the dropdown menu.
- The name of the source report will be displayed for your reference.
 icon in the top right-hand navigation bar.
Step 2: Edit the Source Report
- Ensure that the Resources heading in the left-hand navigation menu is expanded.
- Expand the Reports section in the left-hand navigation menu.
- Use the quick find feature to search for the source report identified in Step 1.
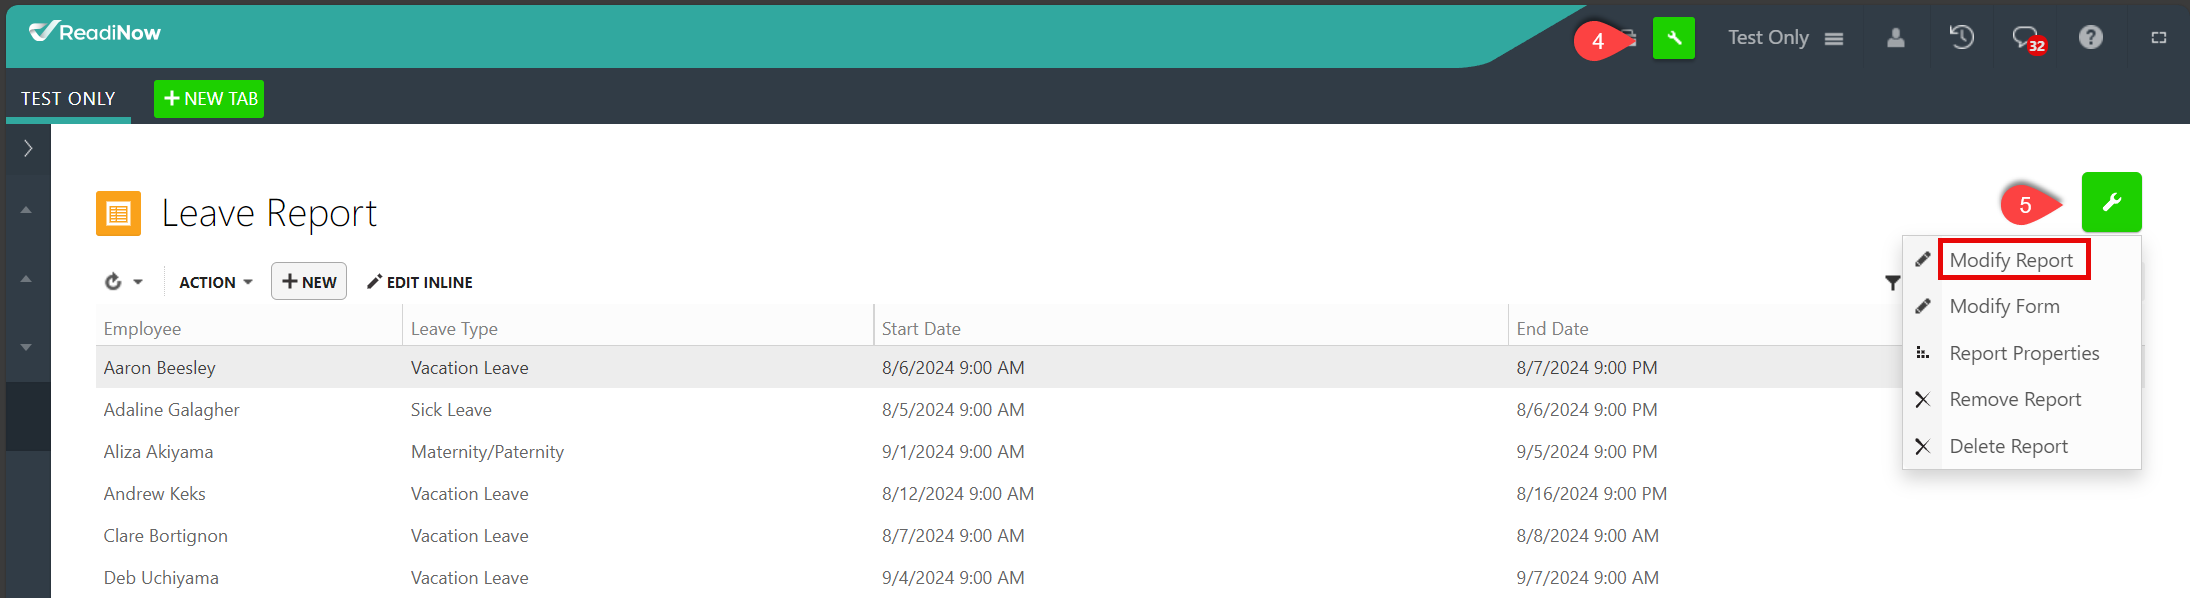
- Enter Report Builder Mode by clicking the configure (spanner) icon in the top right-hand navigation bar.
- Click the configure icon at the top right corner of your report and select Modify Report from the dropdown menu.
- [Optional] To create a working copy of the report, use the Save As option once you are in Report Builder mode. This allows you to keep the original report unchanged in case you need to revert or repeat the transition to the alternate view.

Step 3: Configure the Date Column for your Preferred Grouping
In this example, we will group the data first by year and then by month.
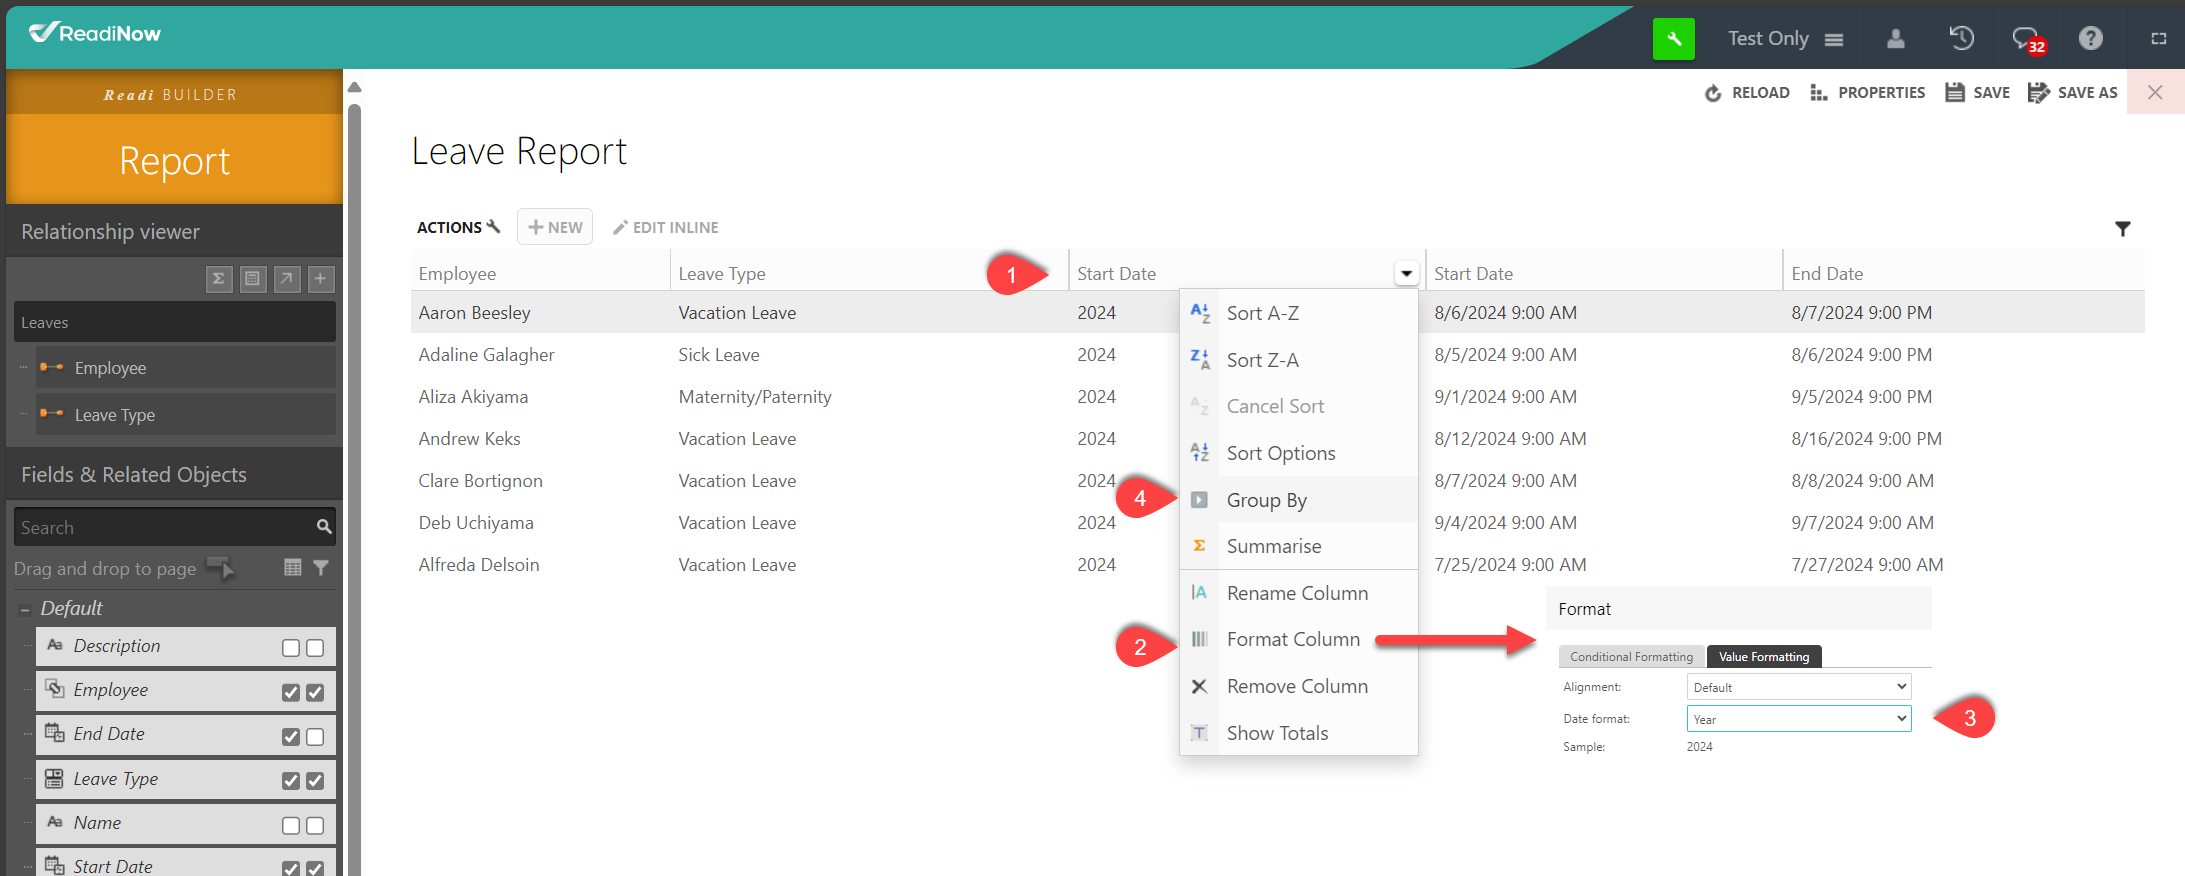
- Duplicate the Date Column: Drag the date column from the left panel and drop it into the report area. (If your report contains two date columns, duplicate the first date column.) The duplicated column will be referred to as the "new column" in the following steps.
- Format the New Column: Hover over the name field of the new column, click the arrow, and select Format Column from the dropdown menu.
- In the Value Formatting tab, change the Date Time format to Year and click OK.
- Group by Year: Use the new column to group your data by year. Hover over the name field of the new column, click the arrow, and select Group By from the dropdown menu.
- Note: If the grouping appears incorrect, save your changes, exit the report, and then re-edit it to see the correct grouping.
- Group by Month: If needed, you can also group your report by month. Repeat the previous steps, starting with duplicating the date column. Select Month for the Date Time format in the Value Formatting. Remember to apply Group By as your final step.
- Save the Report: Once you have completed the configurations, be sure to save your report.

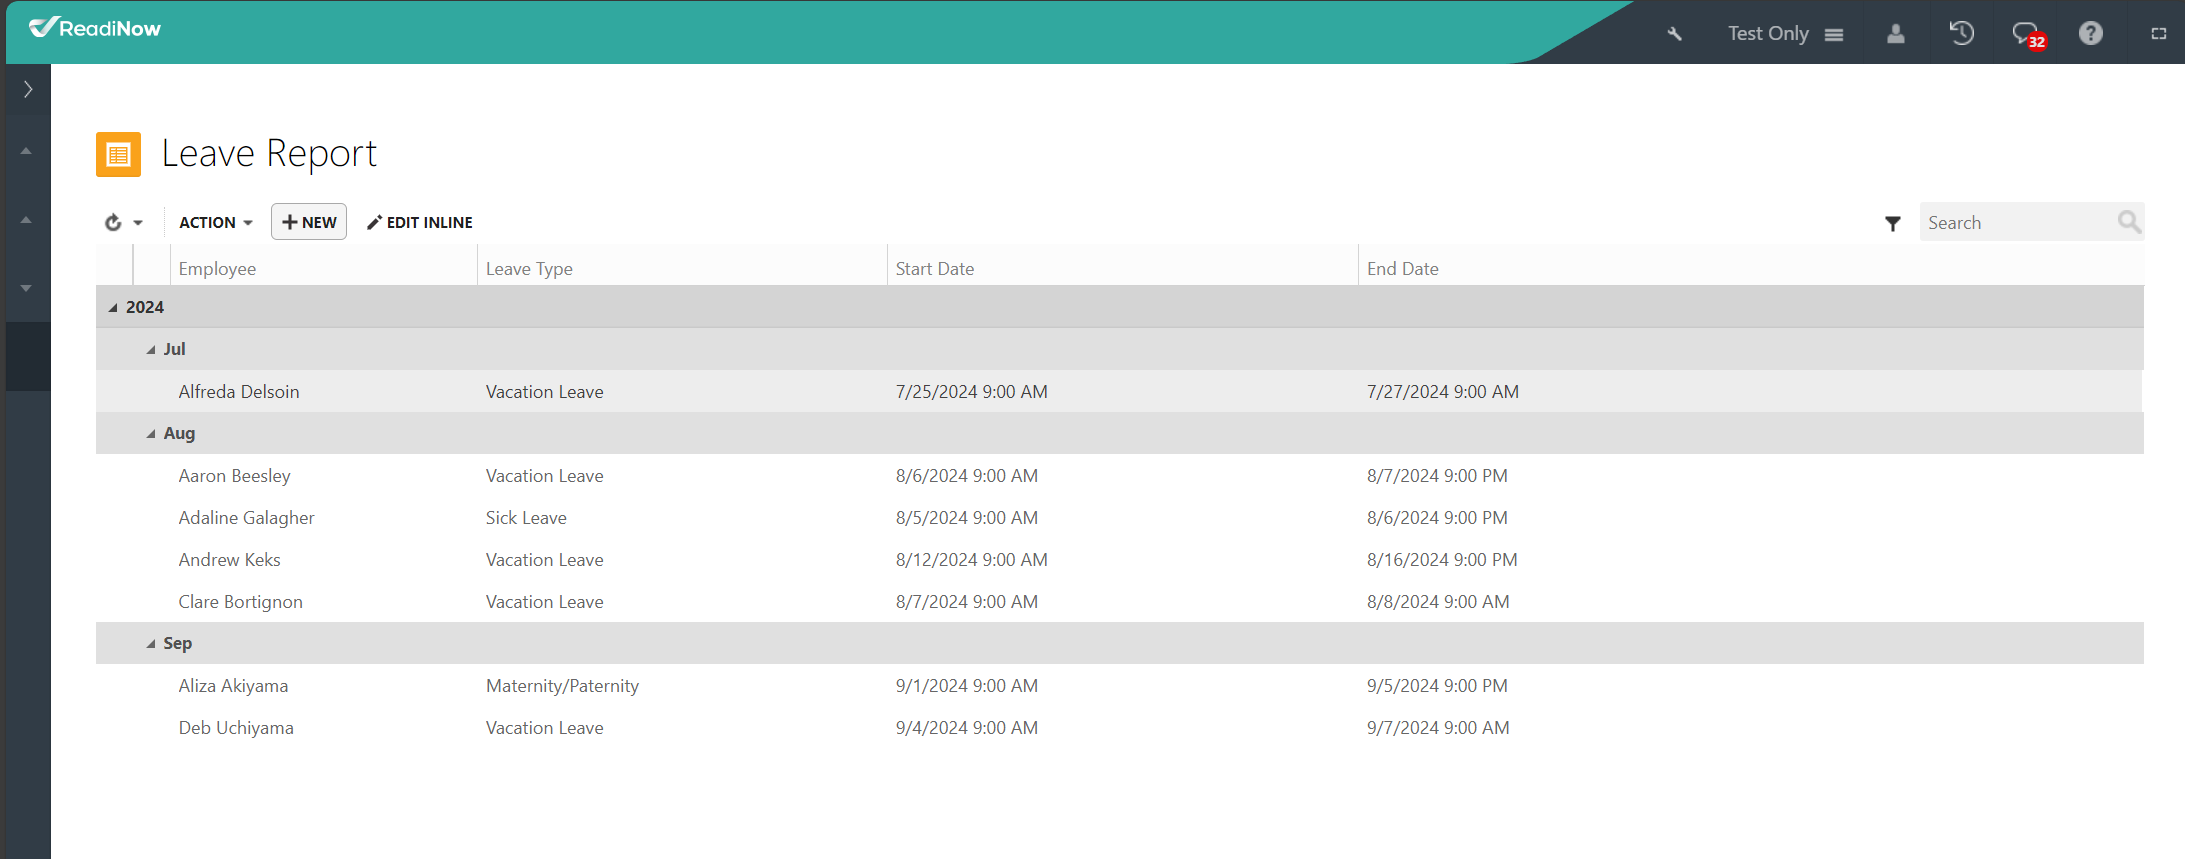
Example of a report grouped by year and month:
You can now easily make your newly designed report accessible to users by configuring the navigation access settings. Once you are satisfied with the layout, simply adjust the access options to share your report as required. (Navigation Access)
For a refresher on Value Formatting, please refer to the following article for detailed guidance: https://readinow.knowledgeowl.com/docs/value-formatting